How to Build an RV Trash Can Cabinet
Project
Room
Skill Level
Are you struggling with finding a good place to put your RV trash can? The struggle of tying a garbage bag to the handle or traipsing in and out to the trash is over! Check out this RV trash can idea.
It turns out most RVs have a void of space below the sink – the perfect area to add a trash can enclosure. This unused space is ideal for hiding that ugly and smelly trash can and be very functional. Learn how to build an RV trash can cabinet by following these easy step-by-step instructions.
Shopping List
Tools/Supplies
Here is a list of tools and supplies that will be needed during the build. Don’t have a specific item? Click the link below to purchase it!
Cut List
To get the cut list with dimensions and in depth step-by-step instructions, download the PDF plans.
Instructions
Limited RV floor space can make adding a garbage can a headache. You may find yourself constantly tripping on it or moving it out of the way. Worse, you might have to resort to tying a garbage bag around a cabinet handle and having your trash hang in the middle of your camper!
Step
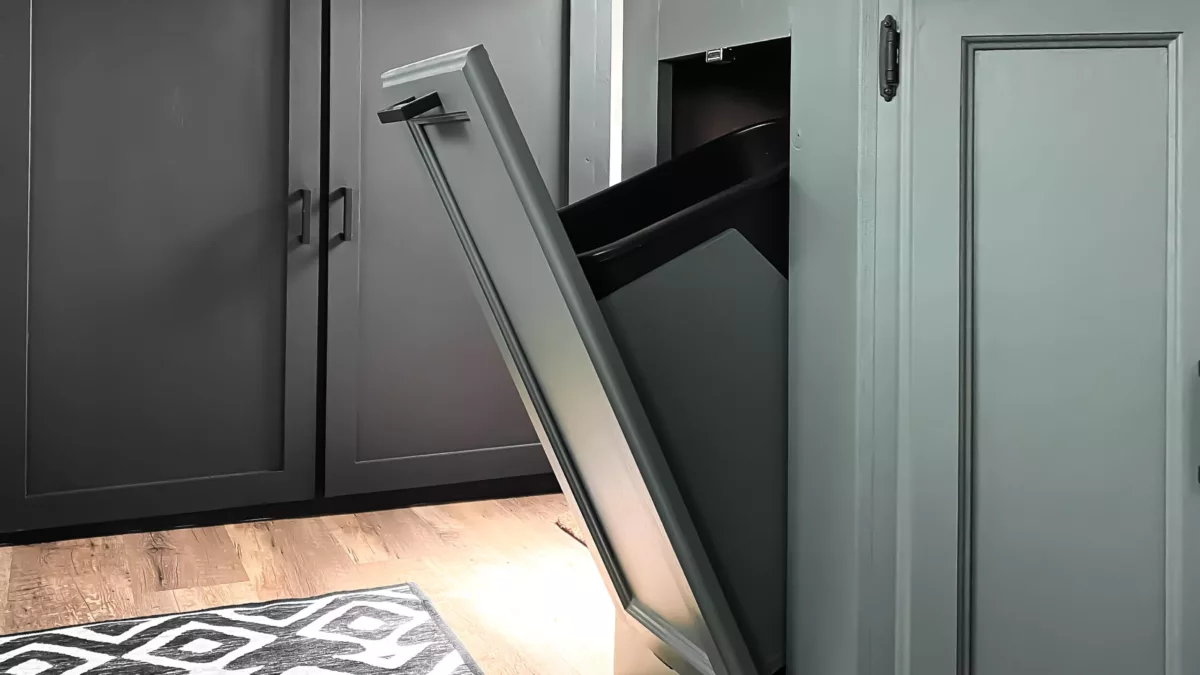
Find a good location for the RV trash can cabinet
Many RVs have a similar kitchen layout – typically including a void of space below the kitchen sink. Some RVs may have a false panel or drawers to the left or right of the sink. This is the ideal space to add the trash can cabinet to your camper.
Remove the false panel or drawers and measure for the dimensions of the opening.
Step
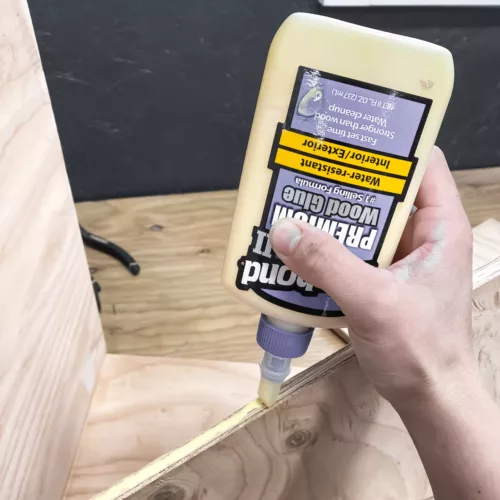
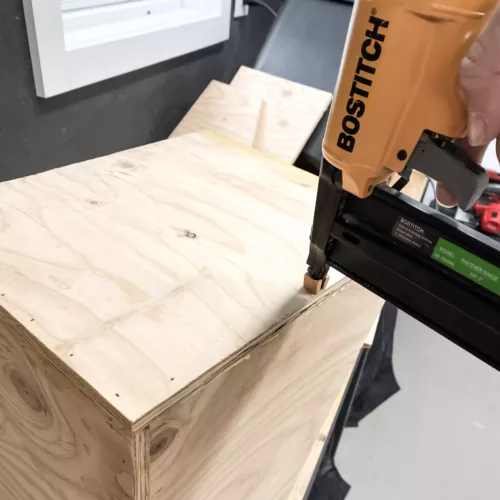
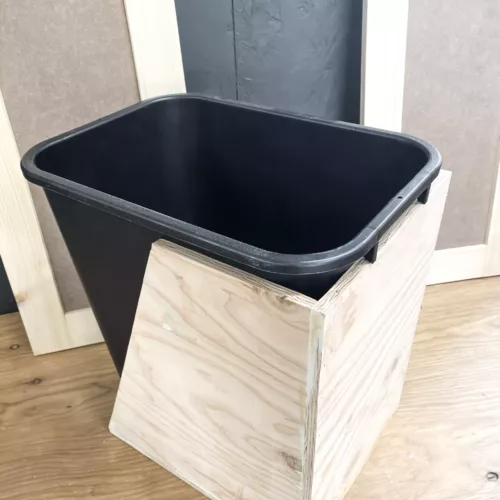
Build the tray that holds the trash can
Follow the step-by-step instructions in the DIY plans to get the exact measurements for the tray and assembly instructions. The plans are customized fit a 7-gallon Rubbermaid trash can (one of the best trash cans for your RV).
Step
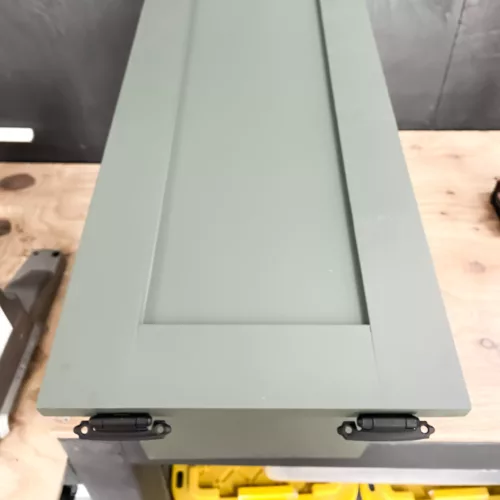
Build or buy an RV cabinet door
There are many ways to build an RV cabinet door. However, I include steps to make the most straightforward cabinet door in my DIY plans.
If you’re looking for an even easier solution, you can purchase a new RV cabinet door for the space instead. Acme Cabinet Doors has inexpensive MDF doors that are customizable to any size.
To get the door size, take the opening dimensions and add 1″ to the width and 1″ to the height. This will allow the door to overhang the rough opening by a 1/2″ on all sides.
Whether you build your own or buy a new cabinet door, you’ll want to paint it to match your existing RV cabinetry. Check out How to Paint RV Cabinets for the steps to paint the cabinet door properly.
Step
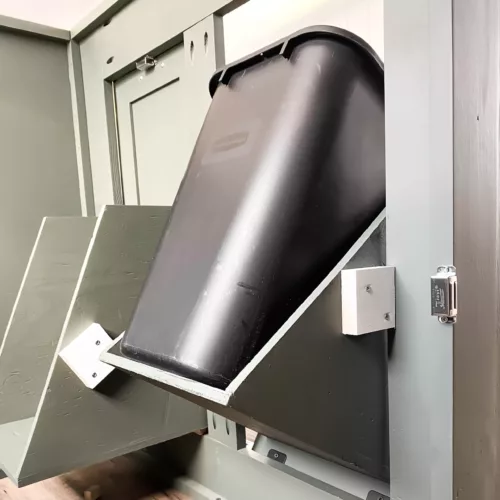
Assemble and install the trash can cabinet
The final step is to assemble all the pieces of your hide-away RV trash can:
- Attach the cabinet door to the tray
- Add the hinges and cabinet pull
- Insert the trash can cabinet into the opening and attach the hinges to the frame
- Finally, install the magnetic latch and the stop block
Once all the build steps are complete, you’ll have a more functional solution for your trash!
Yay! Now you don’t have to look at the trash bag hanging on your cabinet or trip over a garbage can in the middle of the floor. Creating a hidden RV trash can cabinet is a DIY-friendly project that makes a big impact whether you’re a weekend warrior, full-time RVer, or renting out your camper.
More Renovation Ideas & RV DIY Projects
After installing this under-the-cabinet garbage can in your RV, you might be tempted to start another upgrade project. Lucky for you – The Happy Glamper Co. is an expert in all things DIY RV and has many guides to help you with your next project.
Ready to tackle your RV cabinets? Check out this complete guide for painting RV cabinets.
Love the look of shiplap but not the price tag? Try this $1 Sharpie Shiplap for a timeless look.
Walls clashing with your cabinets? Painting is an easy DIY that makes a big difference. Check out this complete guide on painting your RV walls.